Flutter DropdownButton简单使用及魔改源码
我们一般在写业务的时候多会用到下拉菜单,
前面讲过 ExpansionPanel, ExpansionPanel大部分情况用来实现展开列表等稍微复杂的业务逻辑。
而 DropdownButton 则是用来实现稍微简单一点的 点击选择 业务场景。
简单上手
按照惯例我们查看一下官方文档上的说明:
A material design button for selecting from a list of items.
用于从 item 列表中进行选择的 material 按钮。
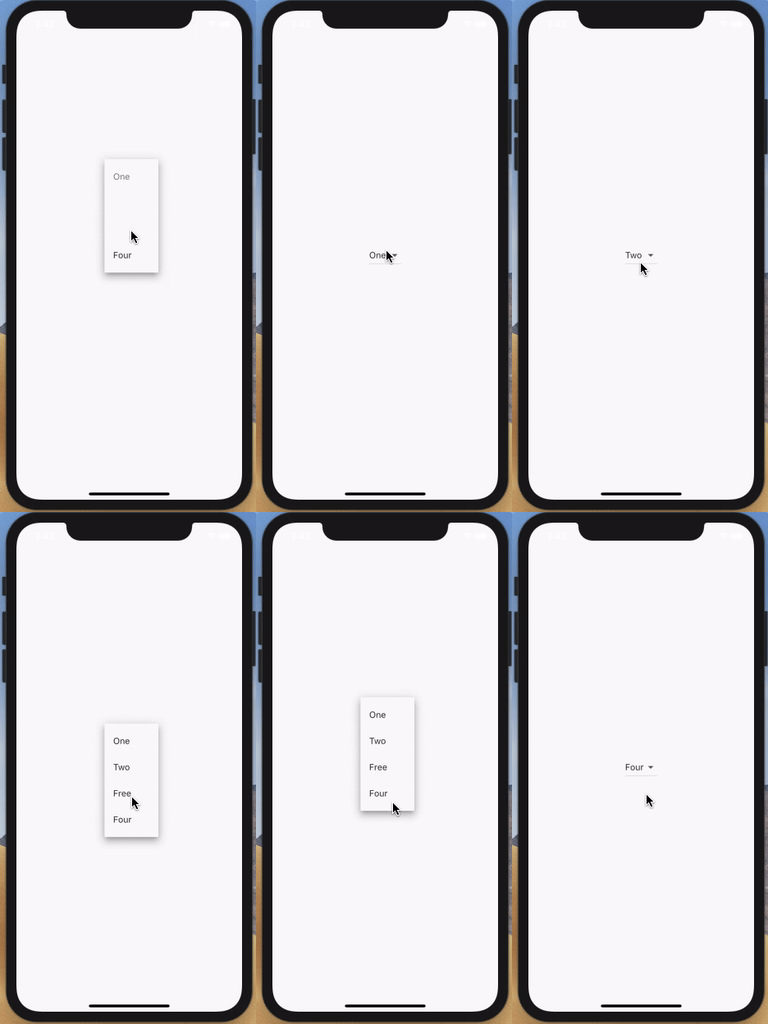
说明的下方就是一大段的 demo,我们先来看一下效果:
没错,不要怀疑,One, Two, Free, Four,这就是官方 demo 上写的。
代码如下:
String dropdownValue = 'One';

// ...

Widget build(BuildContext context) {
  return Scaffold(
    body: Center(
      child: DropdownButton<String>(
        value: dropdownValue,
        onChanged: (String newValue) {
          setState(() {
            dropdownValue = newValue;
          });
        },
        items: <String>['One', 'Two', 'Free', 'Four']
          .map<DropdownMenuItem<String>>((String value) {
            return DropdownMenuItem<String>(
              value: value,
              child: Text(value),
            );
          })
          .toList(),
      ),
    ),
  );
}
这样就简单的实现了上图的效果,现在先来看一下他的构造函数。
构造函数
构造函数代码如下:
DropdownButton({
  Key key,
  @required this.items,
  this.value,
  this.hint,
  this.disabledHint,
  @required this.onChanged,
  this.elevation = 8,
  this.style,
  this.underline,
  this.icon,
  this.iconDisabledColor,
  this.iconEnabledColor,
  this.iconSize = 24.0,
  this.isDense = false,
  this.isExpanded = false,
}) : assert(items == null || items.isEmpty || value == null || items.where((DropdownMenuItem<T> item) => item.value == value).length == 1),
assert(elevation != null),
assert(iconSize != null),
assert(isDense != null),
assert(isExpanded != null),
super(key: key);
挑几个重要的参数解释一下:
•items:类型为 List<DropdownMenuItem<T>>,不必多说,自然是我们下拉出现的列表
•value:当前选定的值,如果没有选择任何一个,则为空。
•disabledHint:禁用下拉列表的时候显示的消息。
•onChanged:当用户选择了其中一个值得时候调用
•underline:用于绘制按钮下划线的 widget
•isDense:是否降低按钮的高度
剩下的看名字应该也能了解个大概了。
刚才我们看到的图中是有下划线的,如果想去除下划线的话,简单可以这么操作:underline: Container(),
也可以使用 DropdownButtonHideUnderline 包裹住 DropdownButton。
简单魔改源码
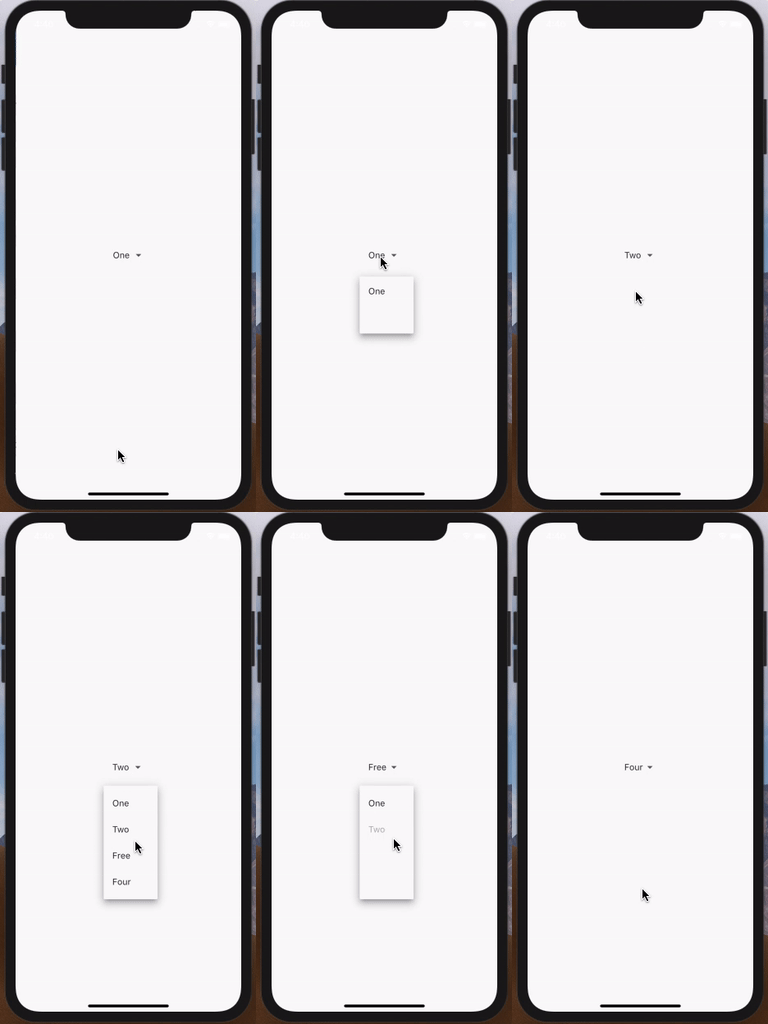
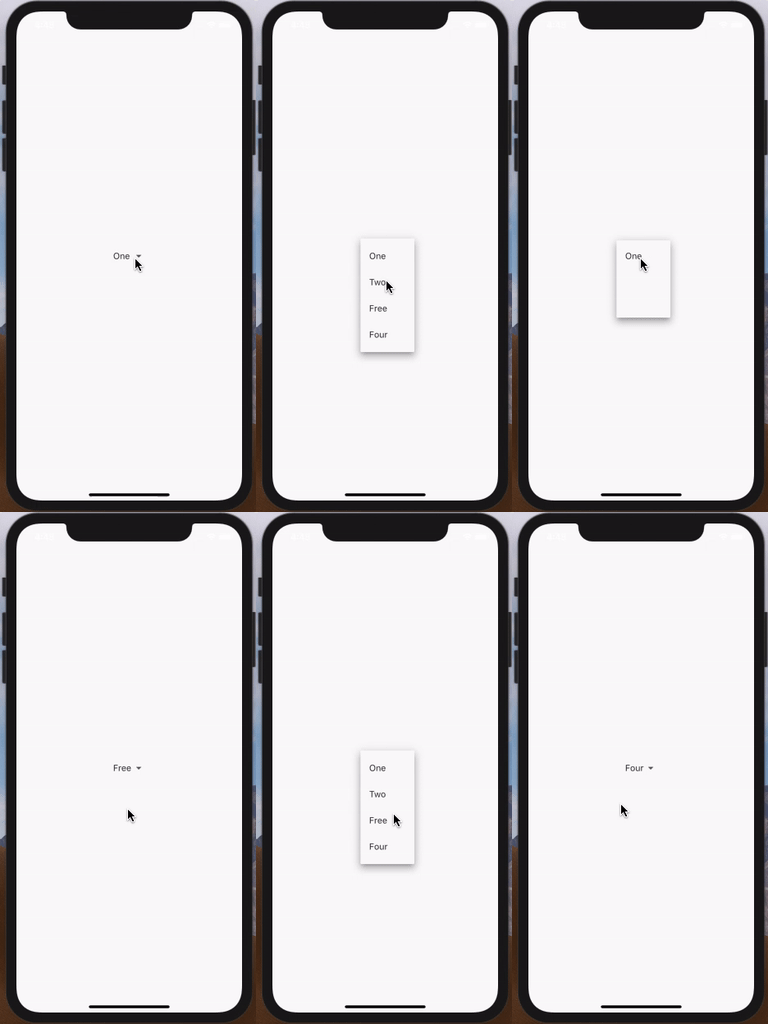
如果需求是如下样式:
点击弹出列表在下方,该如何写?
刚才在上面的图也看到了,每次点击更改后,下次展开就会以上次点击的 index 作为关键点来展开。
那对于这种需求,我们只能 魔改源码。
俗话说得好:
魔改一时爽,一直魔改一直爽。
点击方法
那我们首先找到 _DropdownButtonState 里的点击方法,看看他是如何写的:
void _handleTap() {
  final RenderBox itemBox = context.findRenderObject();
  final Rect itemRect = itemBox.localToGlobal(Offset.zero) & itemBox.size;
  final TextDirection textDirection = Directionality.of(context);
  final EdgeInsetsGeometry menuMargin = ButtonTheme.of(context).alignedDropdown
    ?_kAlignedMenuMargin
    : _kUnalignedMenuMargin;

  assert(_dropdownRoute == null);
  _dropdownRoute = _DropdownRoute<T>(
    items: widget.items,
    buttonRect: menuMargin.resolve(textDirection).inflateRect(itemRect),
    padding: _kMenuItemPadding.resolve(textDirection),
    selectedIndex: _selectedIndex ?? 0,
    elevation: widget.elevation,
    theme: Theme.of(context, shadowThemeOnly: true),
    style: _textStyle,
    barrierLabel: MaterialLocalizations.of(context).modalBarrierDismissLabel,
  );

  Navigator.push(context, _dropdownRoute).then<void>((_DropdownRouteResult<T> newValue) {
    _dropdownRoute = null;
    if (!mounted || newValue == null)
      return;
    if (widget.onChanged != null)
      widget.onChanged(newValue.result);
  });
}
前面定义了一大堆变量,不重要,我们只关心我们想要的,
可以看到在 _dropdownRoute 中传入了一个 selectedIndex,那我们就可以想象的到,这肯定就是问题的根源。
先把它改成 0 试试:
可以看得出来,效果已经实现了大半,可还是遮挡住了最开始的 button,
这个时候就要深入到 _DropdownRoute 当中。
_DropdownRoute
点进 _DropdownRoute 的源码,可以看到,他是继承自 PopupRoute,
class _DropdownRoute<T> extends PopupRoute<_DropdownRouteResult<T>> {
  _DropdownRoute({
    this.items,
    this.padding,
    this.buttonRect,
    this.selectedIndex,
    this.elevation = 8,
    this.theme,
    @required this.style,
    this.barrierLabel,
  }) : assert(style != null);
}
PopupRoute 是可以覆盖在当前 route 上的小部件模式的 route,简单来说就是可以浮在当前页面上。
往下看,找到了 buildPage 方法:
@override
Widget buildPage(BuildContext context, Animation<double> animation, Animation<double> secondaryAnimation) {
  return LayoutBuilder(
    builder: (BuildContext context, BoxConstraints constraints) {
      return _DropdownRoutePage<T>(
        route: this,
        constraints: constraints,
        items: items,
        padding: padding,
        buttonRect: buttonRect,
        selectedIndex: selectedIndex,
        elevation: elevation,
        theme: theme,
        style: style,
      );
    }
  );
}
该方法返回了一个 _DropdownRoutePage, 那我们继续深入。
_DropdownRoutePage
_DropdownRoutePage 是一个 StatelessWidget,那我们直接找到 build方法,
@override
Widget build(BuildContext context) {
  /// ...
  final double topLimit = math.min(_kMenuItemHeight, buttonTop);
  final double bottomLimit = math.max(availableHeight - _kMenuItemHeight, buttonBottom);

  final double selectedItemOffset = selectedIndex * _kMenuItemHeight + kMaterialListPadding.top;

  /// ...

  return MediaQuery.removePadding(
    /// ...
  );
}
省略一些无用代码,来关注我们所要关注的点,
上面代码中有一个变量 selectedItemOffset,该变量就是我们选中的 item 的偏移量,我们只要改掉这个值,就可以完成我们的需求。
那这个值应该设为多少?
很快我们就能想到应该是点击 button 的高度再加上一点间距,
如果获取这个 button 的高度?
上面构建 _DropdownRoutePage 的时候已经给我们传入了一个参数:buttonRect,根据这个我们就可以得到点击 button 的高度了。
那该变量改为:
-
final double selectedItemOffset = (buttonRect.height + 10) * -1;
最后一定要乘 -1,这样就完成了我们上图的效果。
总结
我们在想要定制需求的时候,可以先判断一下原生的控件是否大部分满足我们的需求,
如果大部分已经满足,那么就可以直接魔改源码。
Flutter 的源码真的是给与我们极大的方便,每一种控件都在一个文件内,我们直接复制出来就可以改。
最后再说一句:魔改一时爽,一直魔改一直爽。


